How to use ZapVox
Every feature, step by step, with the exact button name you will see on screen.
From zero to your first audio — 3 clicks
Just installed and not sure where to start? Right here. Three clicks, and the third one already turns audio into text.
- Click the 🧩 in your browser (near the corner where the icons live) and then the 📌 next to ZapVox. The ZapVox icon stays in sight from then on — this is the click most people don't know exists.
- Open WhatsApp Web and click Yes, enable ZapVox on the notice that shows up once. That is the permission for ZapVox to see the audios on screen.
- Hover over an audio and click the ZapVox button that appears beside it. The text shows up right below, inside the conversation.
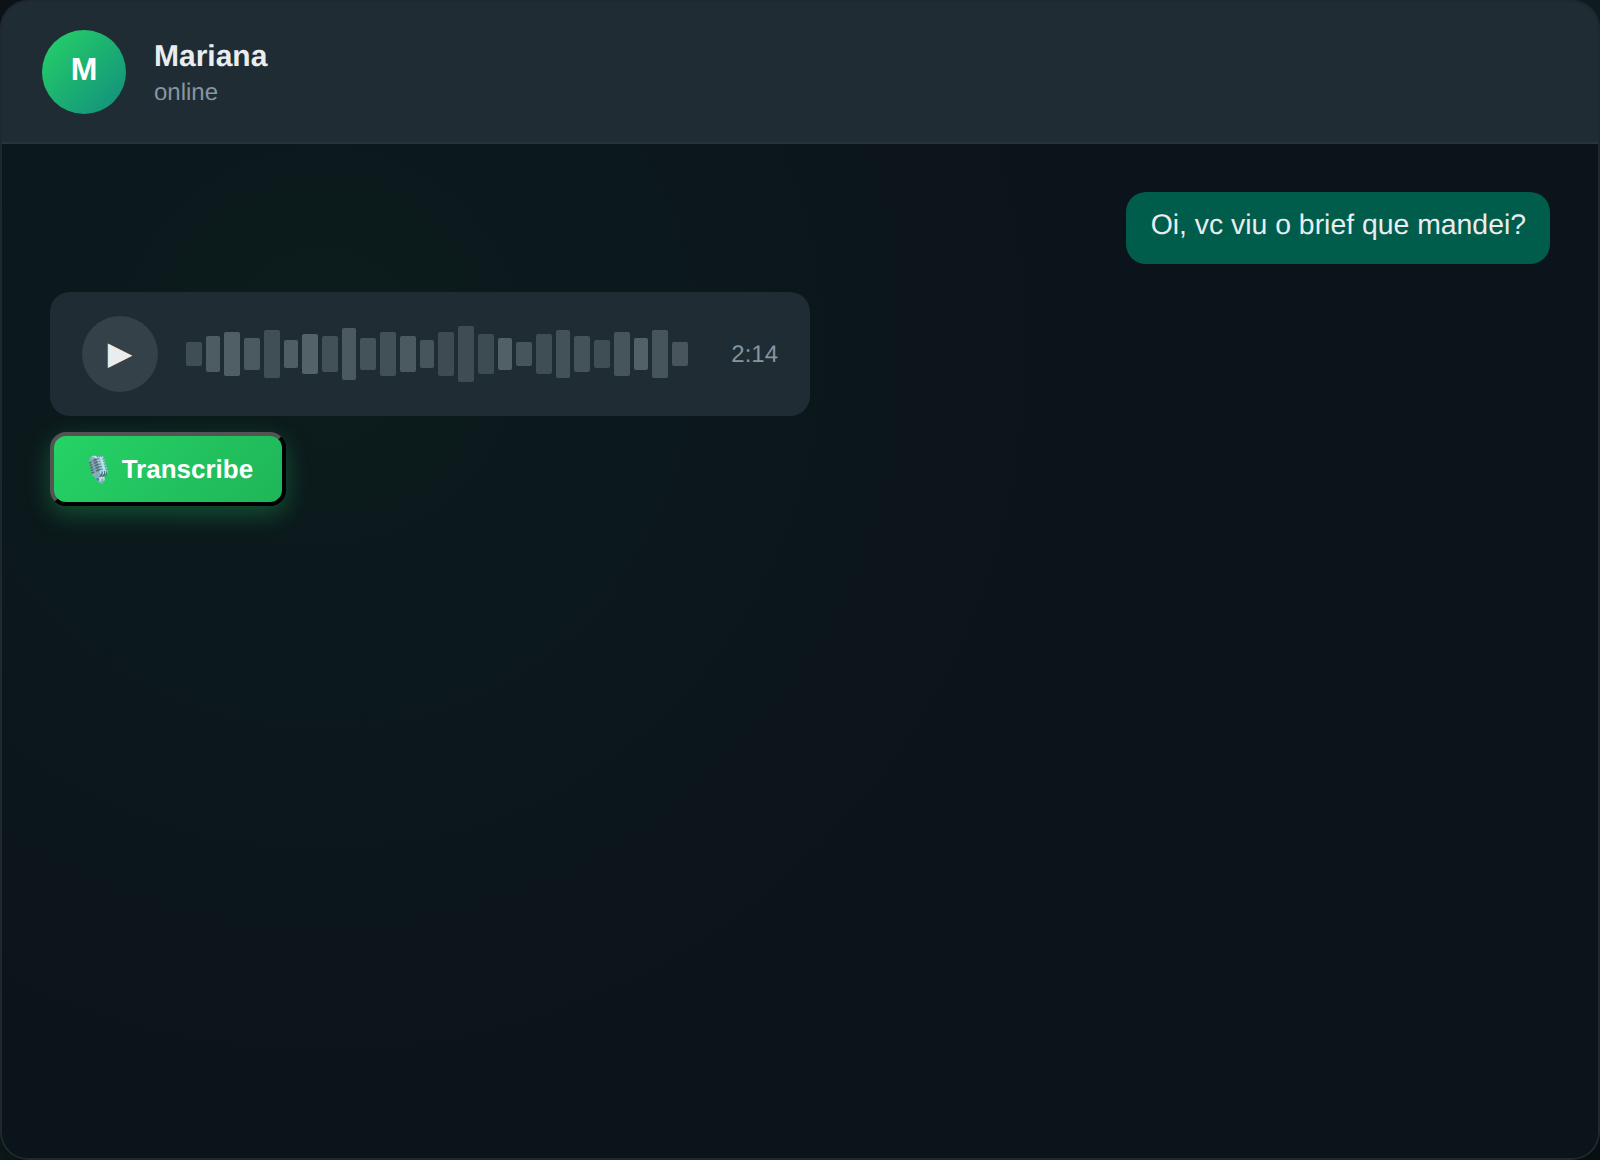
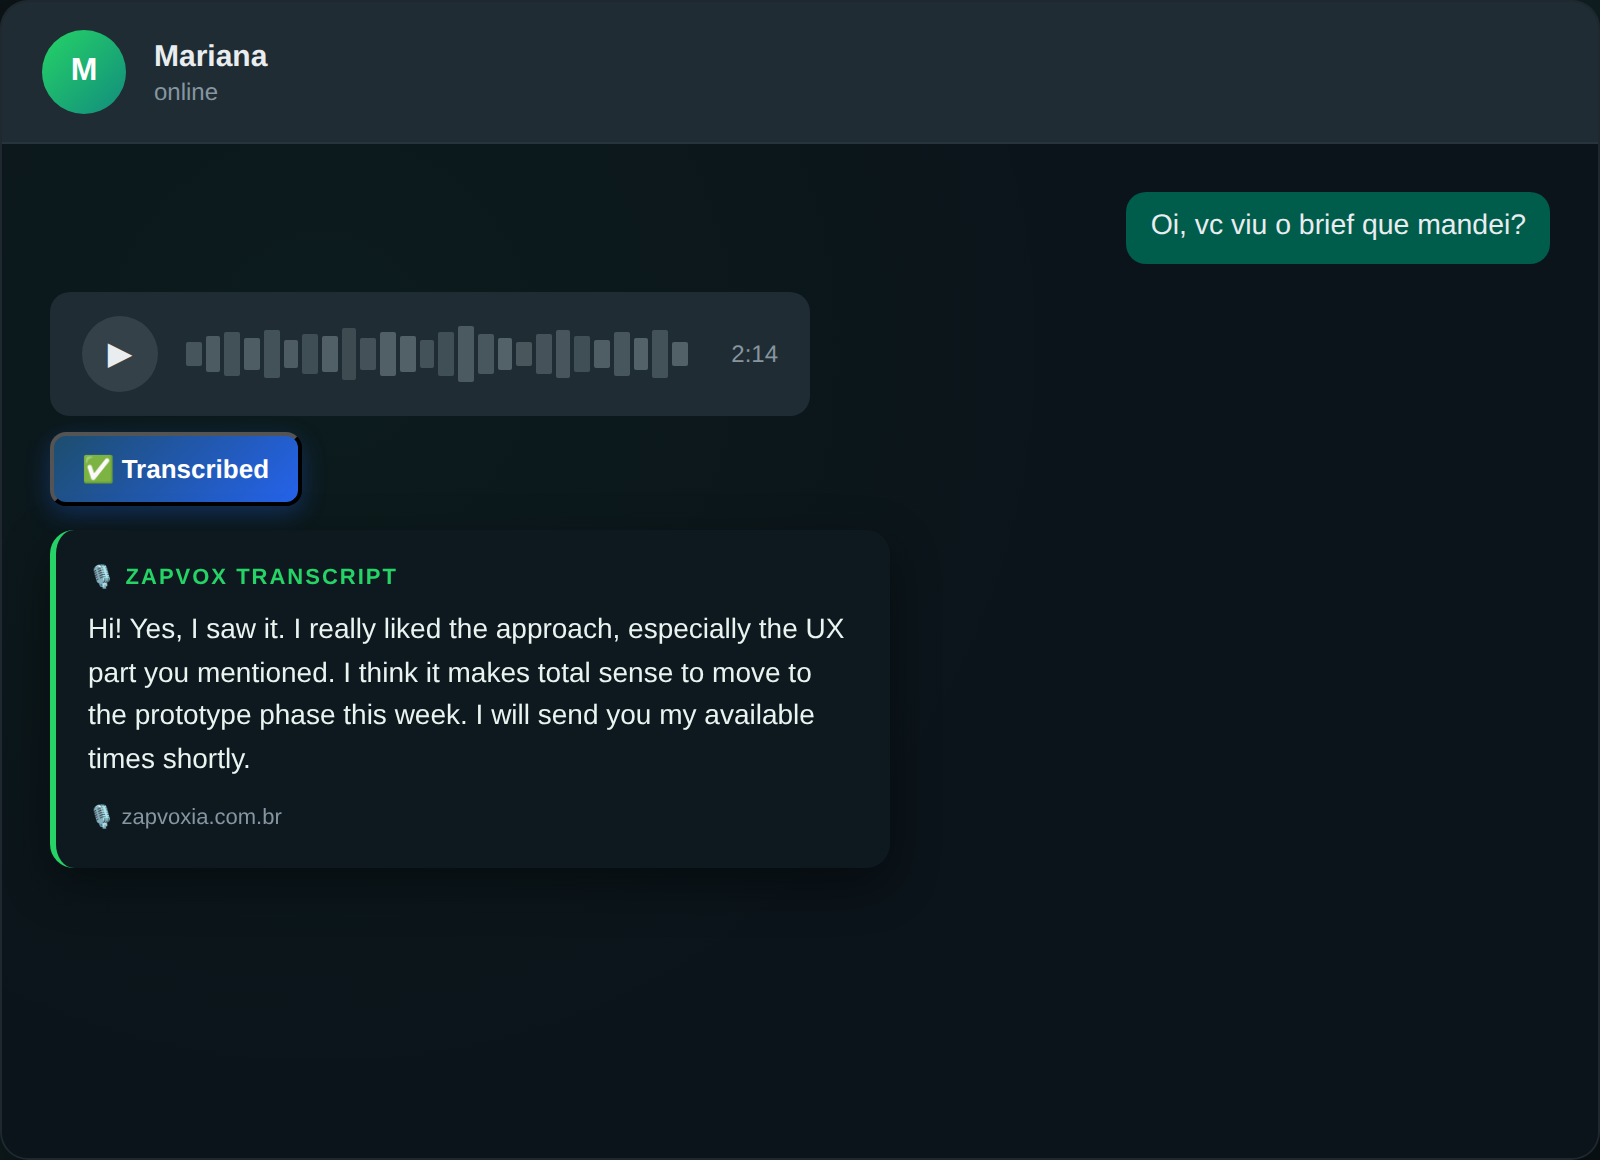
The two chat images are a mock-up of ours, with an invented conversation — we never publish a screenshot of anyone's chat.
Install and sign in
Two minutes. No card.
- Install ZapVox from your browser's store (Chrome, Edge, Brave and other Chromium-based browsers).
- Open web.whatsapp.com and scan the QR as usual.
- Click the ZapVox icon in the browser bar — the panel opens.
- Sign in — Google, Microsoft or e-mail code. On your first sign-in you get 7 days of full access, no card and no charge at the end.
If the button doesn't show up on audios, reload the WhatsApp Web tab (F5). That fixes 9 out of 10 cases.
Transcribe one audio
One click. This is the core feature.
- Hover over any audio on WhatsApp Web: the ✍️ button appears next to it.
- Click it. The text shows up right below the audio, inside the conversation.
- On the finished text you get 📋 copy, and — on Trial and Pro — 🌐 translate, 📝 summarize and 🎭 sentiment.
Can't find the button? It only shows while the mouse is over the audio. If it still doesn't appear, press F5 on WhatsApp Web — that solves it in almost every case.
Automatic transcription
On by default. The switch is on the first screen.
- Open the ZapVox panel. Right on the first screen there is Automatic transcription, with its state written underneath (On — new audios transcribe by themselves).
- With it on, every incoming audio is transcribed on its own, without you clicking.
- To turn it off, same switch. The change applies immediately, across all conversations.
In Settings → Transcription & Translation there is Transcribe new audios only. When on, ZapVox ignores the backlog and only transcribes what arrives from now on — that is what saves your daily quota.
Transcribe your own audios
Optional. Off by default, in Settings.
- Open the ZapVox panel and go to Settings → Transcription & Translation.
- Turn on Transcribe my audios. From then on, the audios you send also turn into text on their own, just for you to read.
- Only want it in some chats? In the ⚙️ gear at the top of the chat, use My audios too — the chat setting beats the general one.
The text of your own audio is never sent to the chat on its own, even with auto-send on — sending is still your click. Each transcribed audio counts toward your daily quota.
Auto-send
ZapVox replies in the chat with the transcription. Read this before turning it on.
⚠️ This feature sends a message on your behalf, as a reply to the audio. The other person sees the transcription. If the conversation is sensitive, leave it off.
- Panel → Settings (gear icon) → Transcription & Translation section.
- Look for the Auto-send block.
- Auto-send — one-to-one chats: turns on sending in individual conversations.
- Auto-send — groups: same thing in groups. It ships off on purpose — in a group the transcription is visible to everyone.
- Send even if I switch conversations: without this, if the transcription finishes after you open another chat, the send is cancelled and you have to sit and wait on screen. With it on, ZapVox delivers to the right conversation even if you already left it.
On Free and Trial, the sent text carries the 🎙️ zapvoxia.com.br stamp. On Pro you can remove it in Settings → ZapVox stamp.
Groups
Off by default — and the reason matters.
- Settings → Transcription & Translation → Transcribe in groups.
- Turn it on only if you want group audios transcribed automatically too.
- Right below there is Translate in groups, for the same behaviour on translation.
A busy group eats through your daily quota fast, because every audio from every participant counts. That is why the default is off.
Copy with translation, summary and sentiment
📋 copies the transcription only — unless you say otherwise.
- Settings → Transcription & Translation → After transcribing block.
- Tick Translation, Summary and topics and/or Sentiment.
- From then on, the 📋 button copies the transcription and whatever you ticked, each part with its own label.
If you ticked Summary but never clicked 📝 on that audio, copy doesn't invent an empty section — it takes only what exists.
Use your own key (BYOK)
Steps outside ZapVox's daily limits. Works on any plan.
- Create a free key at console.groq.com/keys (Groq is the recommended one — faster and with a free tier).
- In the ZapVox panel, open Transcription and pick the 🔑 API tab.
- Click Set up keys →. The field to paste opens right there, just below the button.
- Paste the key into the Groq field. It saves by itself and is tested immediately — if it's invalid, ZapVox tells you instead of failing later.
The key stays in your browser only, encrypted (AES-256-GCM), and goes straight from your browser to the provider — it never passes through our servers. Usage comes out of your own key's quota at the provider. The Free plan stamp still applies even with your own key.
Glossary — hard names and terms
If the transcript always gets the same word wrong — a medicine, a technical term, your company name — this is where you teach it. A Pro feature.
⚠️ This is a Pro feature. On the free plan the section shows Unlock with Pro.
- Open the ZapVox panel and the Glossary section.
- Type the words separated by commas, like the example in the box itself.
- Click Save glossary. It applies to the next transcripts, not to the ones already done.
A few words work better than many: a huge list dilutes the hint. Start with the five it gets wrong most often in your routine.
Schedule a message
Needs to be switched on once, on the first screen.
- In the panel, turn on 📅 Enable message scheduling.
- The scheduling section appears. Pick the contact, write the message and set date and time.
- Keep the browser open at the scheduled time — sending happens through WhatsApp Web itself, on your machine.
- To schedule straight from the conversation, turn on Settings → 📅 and 🔔 buttons in WhatsApp: the icons show up next to the microphone.
If ZapVox can't confirm the message went out, it does not resend — it sends a notification asking you to check. A duplicate message to a client is worse than a late one.
Reminders
A notice on your screen. Nobody else sees it.
- Settings → Reminders → turn on Enable local reminders.
- The 🔔 Reminders section starts showing on the first screen.
- Create the reminder with text and time. At the set moment it fires as a browser notification.
A reminder is not a schedule: the reminder notifies you; the schedule sends a message to someone else.
Search your audios and daily digest
All inside 💬 Chat tools.
- In the panel, open 💬 Chat tools. The search field is the first thing inside.
- Type any word someone said in an audio — search ignores case and accents.
- Right below are export, summarize the open conversation and 🗞️ Daily digest.
- To get the daily digest on its own, turn on 🗞️ Automatic daily digest and pick the time.
Search reads the transcription cache in your browser. Your query never leaves the machine, and with no audios in the day there is no digest.
Per-contact notes: jot things down about the person, on this computer only
A 📌 next to the chat name opens a 500-character pad — with bold, lists and task boxes.
- Open a chat and click the 📌 next to the name, at the top of the chat.
- Write. The note saves itself; the toolbar has B, I, U,
S, list, numbering and ☑ task — plus A/A for the font size. - To find it later: ZapVox panel → 🔎 Search → 📌 Notes tab.
- To turn the button off: Settings → Per-contact notes.
The note lives only in this browser and is never sent to any server — it will not show on another computer. What you gain and lose with that is in Security → notes.
Screen sharing and lock
For meetings, clinics and open desks.
- On the panel's first screen there is 🔒 Privacy mode — it blurs names and messages instantly.
- With blur on, Settings → Privacy & Security → Hover reveals a single item lets you mouse over and read one item without turning the mode off.
- In the same place there is 🔐 Screen lock: it asks for a PIN when opening WhatsApp Web and after a period of inactivity.
The blur is visual and applies to your screen. It changes nothing in WhatsApp or in what the other person sees.
Using it on several computers
Work and home, with the same account.
- Install ZapVox on as many computers and browsers as you use and sign in with the same account on all of them.
- The account stays active in one browser at a time. When you open a second one, Account active in another browser appears with a Use it here button — one click activates it there, with no new sign-in, and the previous one is paused.
- Nothing is lost in the paused one: it goes back to normal when you click Use it here on it. Switching between your own computers has no limit on how many times.
- Daily limits belong to the account, not to the machine — what you use on one computer counts on the same account as the other.
- Need two browsers active at the same time, not just switching? There is the Additional computer add-on at R$ 9.90 per month for each extra active browser — it enables simultaneous use and does not change the quota.
The one-active-browser limit is in Section 4.1 of the Terms. It exists to reduce third-party use of your account.
Invite friends and earn Pro days
Each person who joins through your link gives you 7 Pro days and gives them 7 too. The shortest way to use Pro without paying.
- In the ZapVox panel, open Invite and earn 7 Pro days.
- Click Copy and send the link to whoever you like — inside WhatsApp itself, even.
- When they install and create the account through that link, the days land on their own. The Days earned counter beside it shows the total.
The full rules (limits and what counts as a valid referral) are at zapvoxia.com.br/en/referrals.
If something doesn't work
In this order — it solves almost everything.
- Reload the WhatsApp Web tab (F5). WhatsApp changes its page often and the extension needs to hook in again.
- Check that you're signed in on the ZapVox panel — without a session, cloud features don't run.
- Check whether you hit the daily limit: the panel shows usage in the Transcription section.
- If it persists, open Settings → Diagnostics and use 🐞 Report a problem.
Sending diagnostics is optional and carries only technical codes and version — never the content of your messages or audios.